
DIY Octahedron Montessori Baby Mobile (Detailed Tutorial)
The Octahedron baby mobile is the second of the visual mobiles during infancy. The first mobile is the Munari Mobile; get the full directions and video tutorial here. This fun DIY project will save you money and will be a beautiful addition to your home environment and your baby’s movement area.
What you will need
Supplies
- 3 paper clips
- Nylon string or fishing line
- Foil cardstock in red, blue, and gold (yellow). You’ll find the best prices at your local craft store
- (2) 1/4″ diameter wooden craft dowels
- 1 binder ring
- Spray adhesive
- Octaherdon PDF template
Tools
- Hot glue gun
- Scissors
- Ruler or tape measure
- Bone Folder (Optional)
Procedure
PHAse 1: Construction of the Octahedrons
Step 1: Gather all of your supplies and print off three copies of the Octahedron PDF template.

Step 2: Use spray adhesive to stick the octahedron paper templates to the back side of the shiny paper. Do this in a well-ventilated area.

Step 3: Cut out the octahedron along the outside edge. Go slowly and carefully, taking your time around the corners and keeping all tabs intact, as this is how you will assemble your octahedrons.

Step 4: Fold the octahedron inward along all of the lines. You can use the bone folder to score the paper along all solid black lines to make the folding easier. Alternatively, you could use any straight edge to score the paper. Make strong, crisp folds. This will help when assembling the octahedron.

This post contains affiliate links, which means I make a small commission at no extra cost to you. See my full disclosure here.

Step 5: Next, tie a fishing knot to secure the clear string to the paper clips. Use about 1-foot-long pieces of string; you can always trim them later. Tie the string to 3 paper clips.
Note: The paper clips will be inside each octahedron so they can be hung from the wooden dowels.
How to Tie a Fishing Knot
- Thread one string through the paper clip
- Twist the string together. You can do this easily by holding the string together and twisting the paperclip. Twist 5 to 6 times.
- Take the short end of the string and thread it back through the hole that was formed by the base of the paperclip. Then thread it back through the new larger hole you just created.
- Pull the short tail tight to secure the knot along the paperclip.
- Trim excess string close to the knot.


Step 6: Next, we will assemble the octahedron using a hot glue gun. Be careful when gluing so as not to burn yourself. When gluing, you want to glue and secure tabs in an order that leaves you with two tabs left to glue, which will secure the last side of the octahedron. This will allow you to put the paperclip in place and secure the octahedron easily.


Step 7: Assemble all three octahedra with hot glue. Make sure to secure the paperclip in place before sealing the octahedron closed.


Phase Two: Assembling the Mobile onto Wooden dowels
Step 8: Get two wooden dowels, clear string, and scissors ready to assemble the mobile.
Notes: When securing the mobile pieces to the dowels, don’t secure your knots so tight that they can’t move. The knots should be able to slide along the wooden dowels. This is important when it is time to balance your mobile at the end. Every mobile will look slightly differnet as the weight of the materials will vary slightly.
I used 12-inch craft wooden dowels, however, you could make this work with different-length dowels, you will just have to balance the octahedrons accordingly.
Step 9: Find the middle of dowel B, for me, this was 6 inches in from the end.
Step 10: Cut string about 8 to 10 inches long. Tie a fishing knot to secure the string to dowel B. This string will attach to dowel A.

Step 11: Secure the red and yellow (gold) octahedrons to dowel B. Tie fishing knots with the string coming out of the octahedron about 1 inch from the end of the wooden dowel. Hang the octahedrons about 6 inches from the wooden dowel. Try to make them the same distance from the wooden dowel.

Step 12: Next, tie an 8-12 inch string to dowel A in the center of the dowel. This will be the string that helps to hang the mobile.
Step 13: With the string you just tied to dowel A, take the other end of that string and attach it to either a paper clip or a small (or large, in my case) ring. This is what will allow you to hang your octahedron mobile.

Step 14: Tie the string from dowel A to dowel B, which currently has nothing on it. The distance between the two dowels should be about 3 inches.

Step 15: Once dowel A(top dowel) is attached to dowel B (bottom dowel), attach the blue octahedron to dowel A. The blue octahedron should hang slightly above the red and yellow octahedrons. However, you can hang it how you think it looks best.
Phase 3: Balancing the Mobile
Once all octahedrons are secure, work to balance your mobile. First, start by balancing the blue octahedron to dowel B. Once that is balanced, you can work to balance the red and yellow (gold) octahedrons on the mobile.
Be patient as this can be very tedious. It may be helpful to have another person help hold the mobile while you balance it. You could also set it up on a mobile hanger while you balance the mobile.
Tighten knots and trim strings as needed. Give yourself a pat on the back for completing a beautiful octahedron mobile!

Frequently Asked Questions
What is a Montessori mobile?
A Montessori mobile is a creation of various hanging objects of interest that are suspended in the air for your baby to look at while alert and awake. A Montessori mobile offers a visual experience for developing your baby’s visual tracking skills.
The mobile series offers something interesting and captivating for your baby to look at, whereas tactile mobiles offer more opportunities for hand-eye coordination, where your baby is interacting with the mobile physically.
There are traditionally 4 Montessori mobiles that offer various levels of complexity and elements for an infant. This DIY tutorial will show you how to make the second mobile in the visual series, the Octahedron mobile.
When should I start using the Octaherdon mobile?
The Octahedron mobile can be used around 5 weeks of age, especially great from about 5-8 weeks old. It is the second visual mobile. The first is the Munari mobile. Check out this blog post for a DIY Munari Mobile.
How do I hang my Octahedron mobile?
You can hang mobiles from a floor mobile hanger. Alternatively, you could anchor a hook in the ceiling, hang a long ribbon down, and then connect the mobiles closer to your baby’s level. You could attach a wooden ring at the top of the mobile to hang it. Another way you could hang your mobile is to use a wind chime hanger that juts out from the wall, which would allow you to hang the mobile from it and still have it move freely. The best place is where your baby will have the most opportunities to work with the mobile.
The mobile should hang about 12 inches above your child’s eyes when they are lying on their back looking at the mobile.
How do I store my mobile when I’m not using it?
I found it best to store all of my mobiles in a plastic storage container. Place tissue paper between each mobile so they don’t get tangled up with each other. You could also hang them on the wall and use them as room decor; they are just that beautiful!

What Montessori mobile do I use next with my baby?
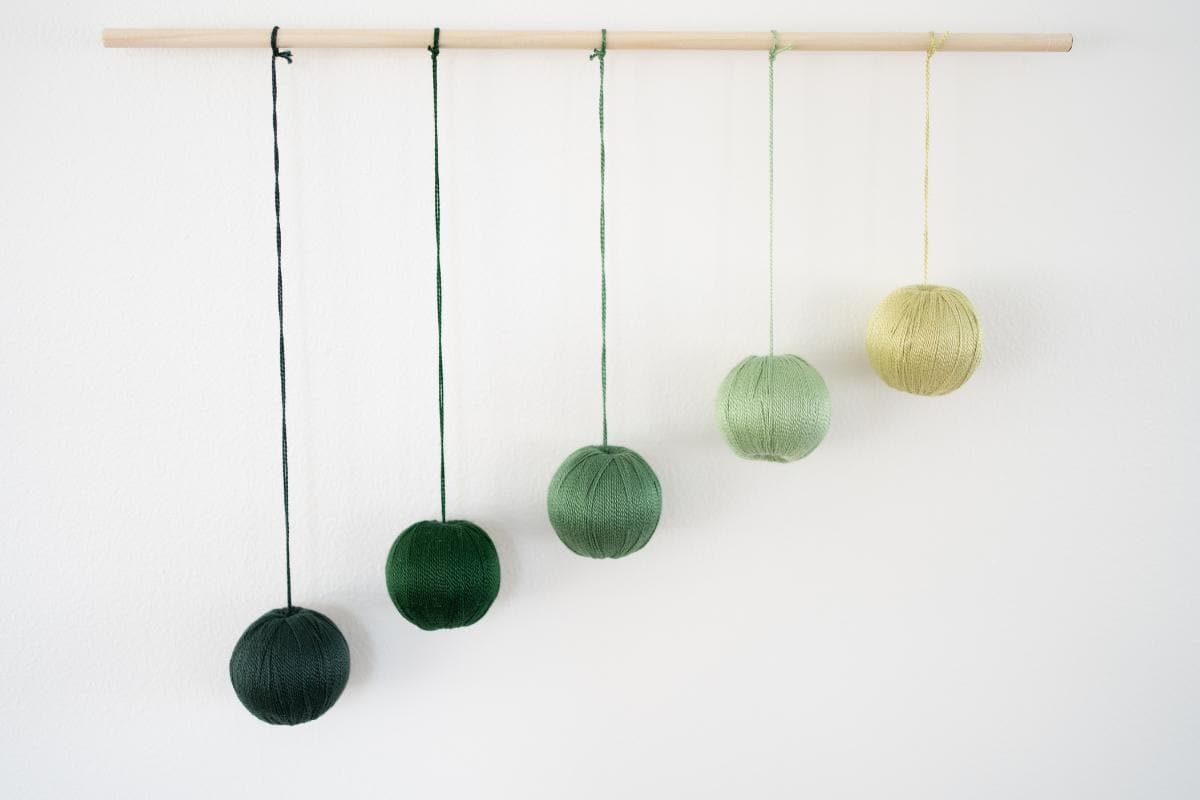
The next of the traditional mobiles is the Gobbi mobile. The Gobbi mobile is a beautiful creation of 5 spheres wrapped in embroidery floss, hanging from one dowel in descending order at a 45-degree angle. Get the full, detailed tutorial here. After the Gobbi mobile, you can introduce the dancer mobile; a tutorial will be coming soon!
Where do I set up a Montessori mobile in my home?
You can set up your baby mobiles in a Montessori movement area. A movement area has three essentials; check out this blog post to prepare your own movement area in your home.


7 Comments